Guide to Creating Menus in Doblly
In this tutorial, we will show you how to create and manage menus in your Doblly store – including the header and footer menus.
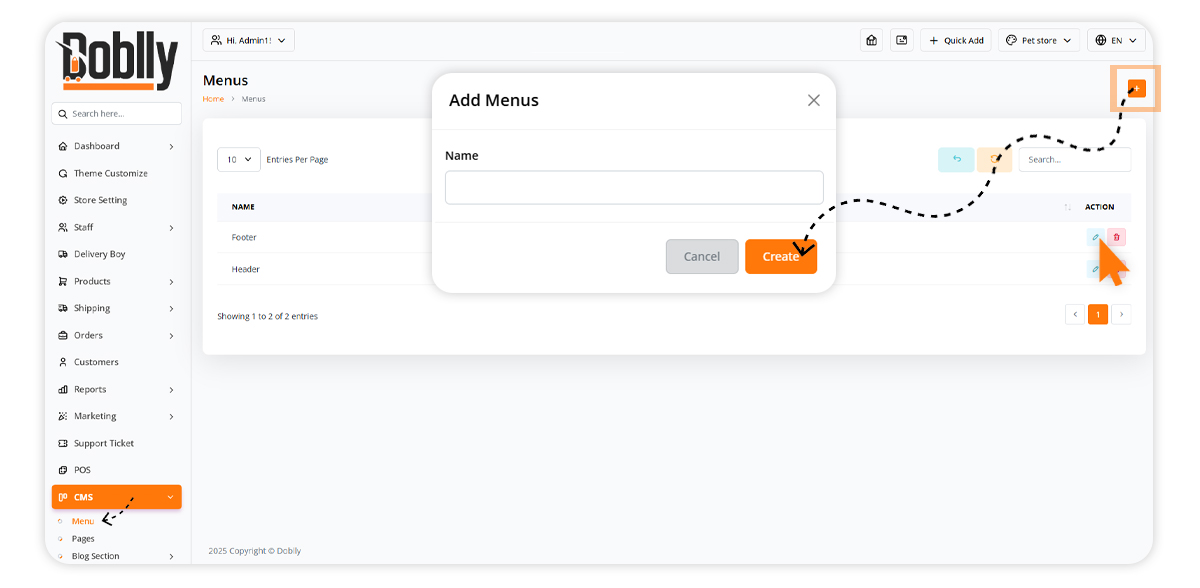
📝 Step 1: Create a Menu
To get started, create a menu from the CMS section:
- Go to "CMS" from the admin sidebar and click on "Menu".
- Click on "Add Menu" at the top right corner.
- Enter a name for the menu, for example "Header".
- Choose which buttons/links you want to include, or add an external link if needed.
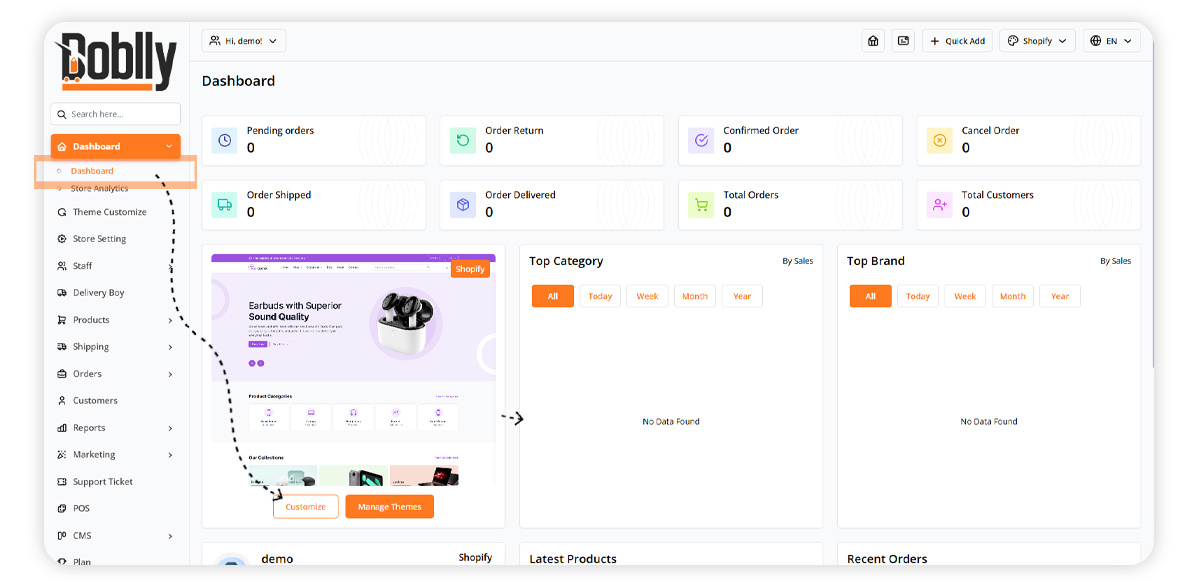
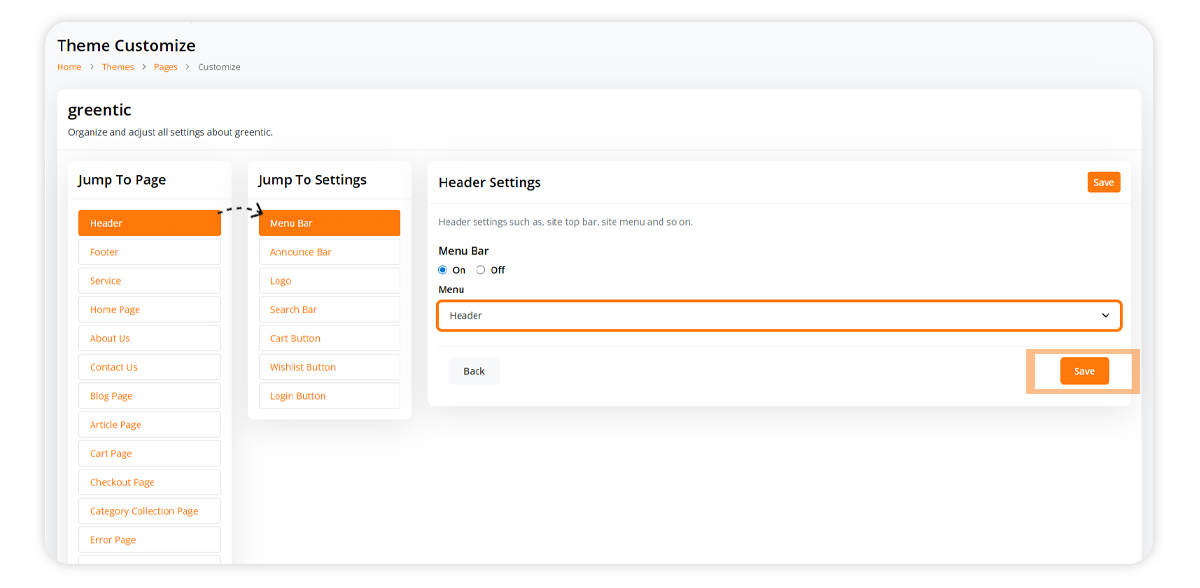
🎨 Step 2: Assign Menu to Header
Now let’s assign the menu to the top of your store:
- Go to "Customize".
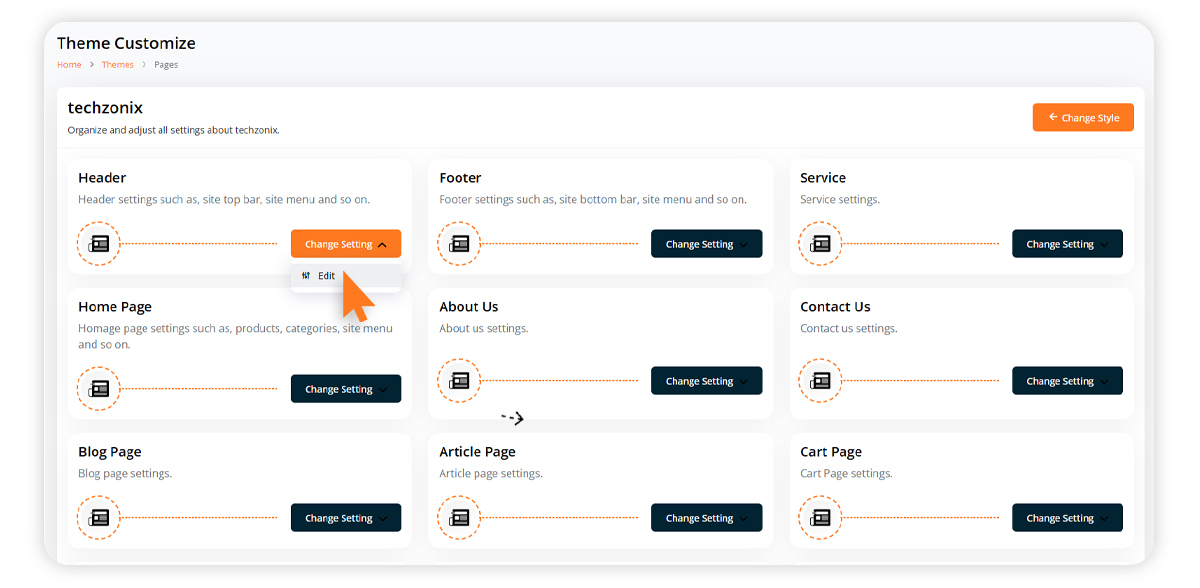
- Select the "Header" section to edit.
- Click "Change Settings", then "Edit".
- Select "Menu Bar".
- Choose the menu you created to appear at the top of your site.
- Click "Save".
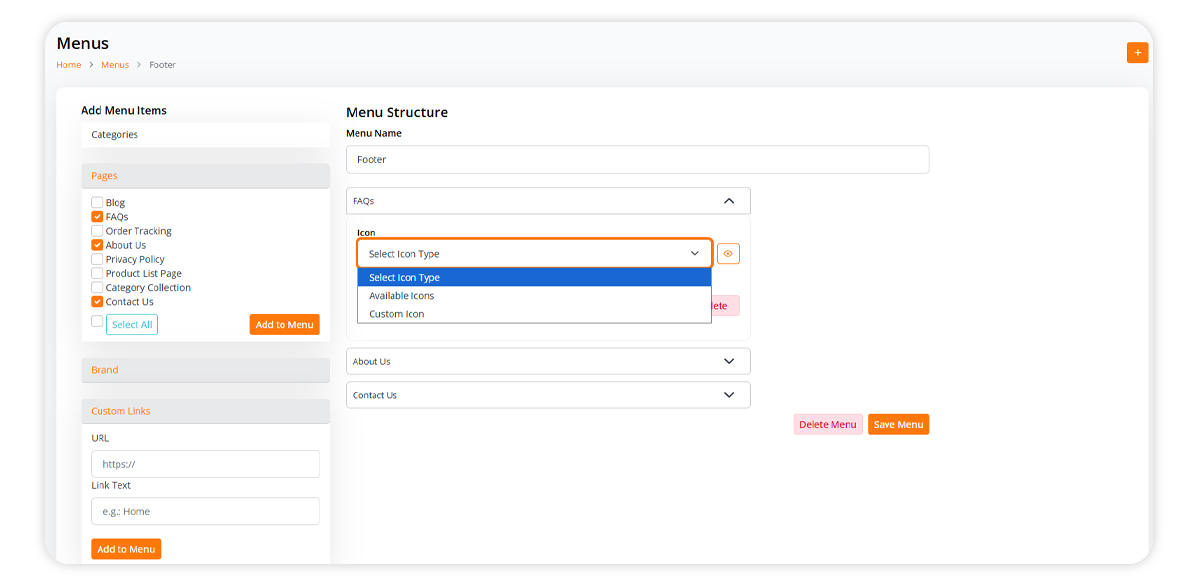
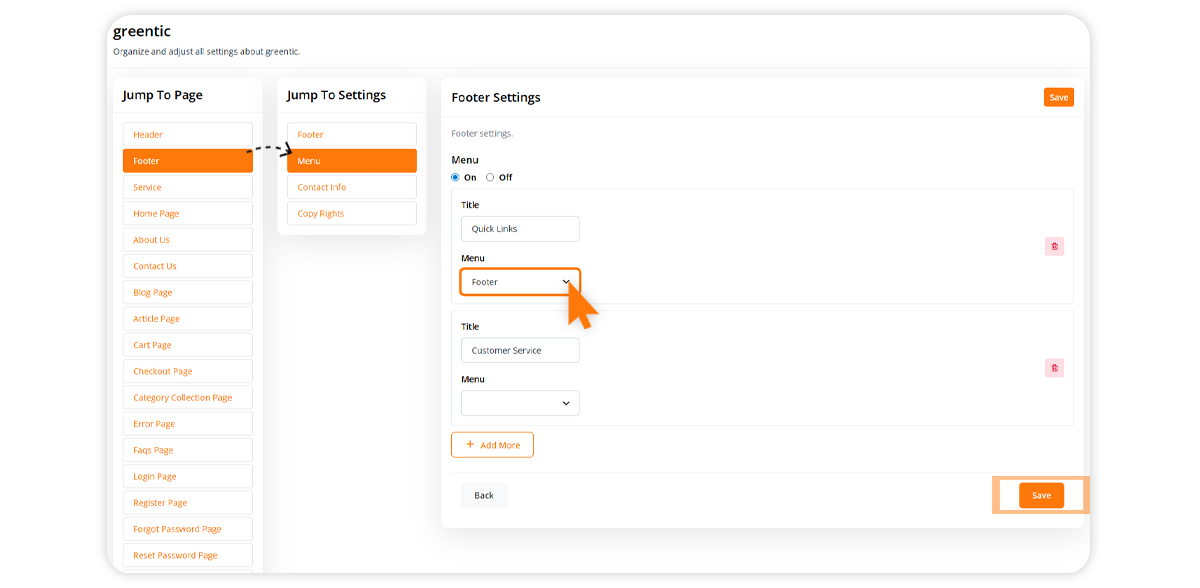
⚙️ Step 3: Assign Menu to Footer
Finally, let’s set up the footer menu:
- Go to "Footer" and then "Menu".
- Select the menus you want to display at the bottom of the site.
- Click "Save" to apply the changes.
🎉 That’s it!
You’ve successfully created and assigned menus in your Doblly store.
Tbistone
Very quick customer support, installing this application on my machine locally, within 5 minutes of creating a ticket, the developer was able to fix the issue I had within 10 minutes. EXCELLENT! Thank you very much
Chordsnstrings
from codecanyon